Microsoft Office 2010 Installer Channel Switcher
10 Microsoft Office Add-ins Grammarly. The built-in grammar engine in Microsoft Office isn’t as powerful, and it seems. If you’re an author of professional documents or just want to improve. Jul 17, 2013 Microsoft.NET Framework 4.0 or 4.5 (Not 3.5) Microsoft Office 2010 or Later for Office Toolkit Support; Windows Vista or Later for Windows Toolkit Support; MICROSOFT TOOLKIT FUNCTIONS. Main Tab: Office Information: This states if Microsoft Office is installed and supported on your PC and whether it is 32 bit (x86), 64 bit (x64) or 32 bit running on 64 bit.
ImportantOffice 365 ProPlus is being renamed to Microsoft 365 Apps for enterprise, starting with Version 2004. To learn more,. In our documentation, we'll usually just refer to it as Microsoft 365 Apps.One of the benefits of Microsoft 365 Apps is that Microsoft can provide new features for Office apps on a regular basis, through monthly updates.
However, as the admin who deploys Microsoft 365 Apps to the users in your organization, you might want to have more control over how often your users get these new features. Microsoft provides you three options, called update channels, to control how often Microsoft 365 Apps is updated with new features. Here's an overview of the three options.
NotePrior to September 2017, these update channels were named Current Channel, Deferred Channel, and First Release for Deferred Channel.Which update channel you decide to deploy to your users depends on several factors, including how many line-of-business applications, add-ins, or macros that you need to test any time there is an updated version of Microsoft 365 Apps. Note. There is also Monthly Channel (Targeted). This update channel provides an early look at the upcoming Monthly Channel release. It is a supported update channel, and usually is available at least one week ahead of time when it's a Monthly Channel release that contains new features.
Monthly Channel (Targeted) is also part of the Office Insider program. For more information, see.Semi-Annual Channel for Microsoft 365 AppsIf your organization doesn't want to deploy the latest features of Office right away or you have a significant number of line-of-business applications, add-ins, or macros that you need to test with Office, then Semi-Annual Channel might be the better choice for your organization. That's because new features are added to Semi-Annual Channel only twice a year, instead of every month. Semi-Annual Channel is the default update channel for Microsoft 365 Apps for enterprise.A Semi-Annual Channel with new features is expected to be released twice a year, in January and July. New features aren't added to Semi-Annual Channel at any other time.
The features that are included in Semi-Annual Channel are features that have been released previously in Monthly Channel.In the four months prior to a new Semi-Annual Channel feature release, Microsoft provides builds of the upcoming release so that pilot users and application compatibility testers in your organization can work with the upcoming release. These builds are provided through the update channel and provide the same features and functionality that will be in the next release of Semi-Annual Channel that includes new features.After the January and July releases of Semi-Annual Channel, additional security updates, if needed, can also be added to Semi-Annual Channel. A release of Semi-Annual Channel with these updates usually occurs on the second Tuesday of the month. If there is a critical non-security issue that needs to be fixed in Semi-Annual Channel, that non-security update will also be included in a Semi-Annual Channel release, usually on the second Tuesday of the month.Semi-Annual Channel (Targeted) for Microsoft 365 AppsTo help your organization prepare for a Semi-Annual Channel release, Microsoft provides Semi-Annual Channel (Targeted). The primary purpose of this update channel is to give pilot users and application compatibility testers in your organization a chance to work with the upcoming Semi-Annual Channel release. During this time, which is about four months, you might identify possible issues that you need to fix with your line-of-business applications, add-ins, or macros or that you want Microsoft to fix. Semi-Annual Channel (Targeted) releases provide the same features and functionality that will be in the next release of Semi-Annual Channel that includes new features.A Semi-Annual Channel (Targeted) with new features is expected to be released twice a year, in March and September.
New features aren't added to Semi-Annual Channel (Targeted) at any other time. The features that are included in Semi-Annual Channel (Targeted) are features that have been released previously in Monthly Channel.The March and September feature releases for Semi-Annual Channel (Targeted) also include security and non-security updates that have been released previously in Monthly Channel. After the March and September releases, additional security and non-security updates, if needed, can also be added to Semi-Annual Channel (Targeted). NoteWindows 10 also plans to target the March and September time frames for providing feature updates to Windows 10. Those releases will also be referred to as Semi-Annual Channel and also will be supported for 18 months.Configure the update channel to be used by Microsoft 365 AppsSemi-Annual Channel is the default update channel for Microsoft 365 Apps for enterprise.
But you can configure a Microsoft 365 Apps for enterprise installation to use Monthly Channel or Semi-Annual Channel (Targeted). Also, not all users in your organization have to be configured the same.
Note: For more information about the 64-bit version, see.If you want to do a custom install or uninstall where you select only some apps, see the section below. Install 32-bit (default) Office 2010.Insert the Office 2010 disc into the drive. If the setup wizard doesn’t start automatically, navigate to the disc drive and click SETUP.EXE.If you don’t have a disc, you can with your product key.When prompted, enter the product key.If you need help, see.Read and accept the Microsoft Software License Terms, and then click Continue.Follow the prompts and after Office installs, click Close.In the Activation wizard, click I want to activate the software over the Internet, and then follow the prompts.You’ll need to activate Office to keep your Office programs filly working. If you don’t activate it when you install, you can activate it later from an Office application by clicking File Help Activate Product Key.For more information, see.Install 64-bit Office 2010What you need to know before installing 64-bit Office:.You must be running 64-bit Windows. To check, see.Uninstall any 32-bit versions of Office. See.Make sure any 3rd-party Office add-ins that you rely on are stated as being Office 2010 and 64-bit compatible. Important: You can’t remove Office programs individually after the suite has been installed.
You must uninstall Office completely, and then reinstall it using a custom installation following the steps outlined above. Install or remove individual Office program componentsWhen you first try to use a feature that is not yet installed, Office usually installs the feature automatically.If the feature that you want is not installed automatically, do the following:.Exit all programs.In Microsoft Windows, click the Start button, and then click Control Panel.Do one of the following:.Windows 7 and Windows Vista Click Programs, and then click Programs and Features. Click the name of the Microsoft Office suite or program you want to change, and then click Change. Note: In Classic view, double-click Add or Remove Programs, click the name of the Microsoft Office suite or program you want to change, and then click Change.In the Office Setup dialog box, click Add or Remove Features, and then click Next.Click the custom installation options that you want:.Click a plus sign (+) to expand a folder and see more features.The symbol next to each feature indicates how that feature will be installed by default. You can change how the feature will be installed by clicking its symbol, and then selecting another symbol from the list that appears. The symbols and their meanings are as follows:Run from My Computer The feature will be installed and stored on your hard disk when you complete Setup. Subfeatures won't be installed and stored on your hard disk.Run all from My Computer The feature and all of its subfeatures will be installed and stored on your hard disk when you complete Setup.Installed on First Use The feature will be installed on your hard disk when you use the feature for the first time.
That’s why CodeRunner supports full-blown IDE-level code completion for most languages, including fuzzy-search, tab-selectable placeholders, and documentation snippets. Keygen runner osx.
At that time, you may need access to the CD or network server that you originally installed from. This option may not be available for all features.Not Available The feature won't be installed because it is not available.If a feature has sub-features, a symbol with a white background indicates that the feature and all of its sub-features have the same installation method. A symbol with a gray background indicates that the feature and its sub-features have a combination of installation methods.You can also use the keyboard to browse through features and change feature options. Use the UP ARROW and DOWN ARROW keys to select features.
The levels generates properly for the Hell Forged. The weapon items are present in the mod and its actually possible to autoswap for them if all La Tailor girl weapons are empty. Please tag these posts with game name, to make them easier to distinguish.Reminder: Please use Post flairs to help others see what kind of content you're posting. Result - i have weapons from La Tailor Girl to choose from, but I don't have proper choice for the Hell Forged weapons.  For example I did the following: I have La Tailor Girl mod (pak) + Hell Forged mod (wad)+ Pywheel.
Use the RIGHT ARROW key to expand a feature that contains one or more sub-features. Use the LEFT ARROW key to collapse an expanded feature.
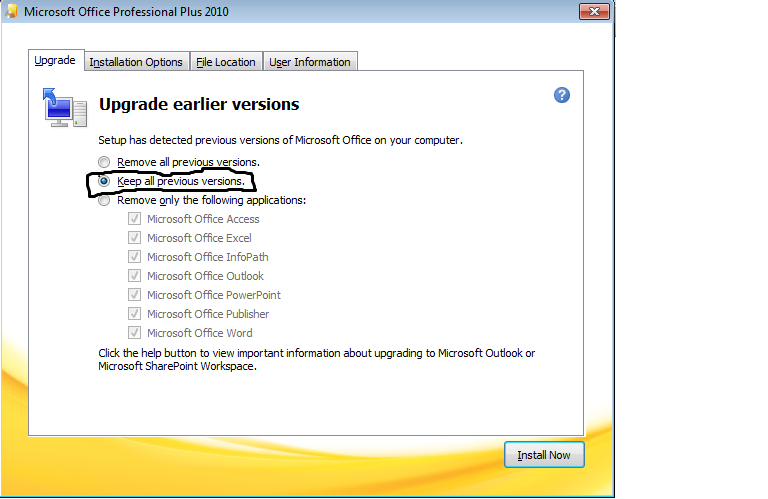
When you have selected the feature that you want to change, press SPACEBAR to display the menu of setup choices. Use the UP ARROW and DOWN ARROW keys to select the setup option that you want, and then press ENTER.When you are done choosing the custom installation options that you want, do one of the following:.Click Upgrade. This button appears if Setup detects an earlier version of the same Office program on your computer.Click Install Now. This button appears if Setup does not detect an earlier version of the same Office program on your computer.See Also.
- понедельник 27 апреля
- 27