Visual Studio 2019 Change Install Location
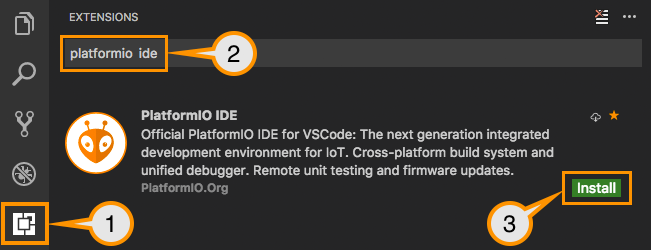
Table of Content.Edition of Visual Studio 2019The Visual Studio 2019 comes in three editions. The Community, Professional & EnterpriseThe download and installation process is very simple and similar to the. You can run both 2017 and Visual Studio 2019 side by side.
Visual Studio lets you pause code execution the moment you want to inspect a bug, using the breakpoint and method you need. If you’ve taken one step too far or encountered an unexpected change, you can step back to any specific line of code–no need to restart your session or recreate your state.
Important Links.System Requirement for Visual Studio 2019 Supported OS Windows 10. Minimum Version 1703. Editions Supported Home, Professional, Education & Enterprise. Autocad 123d beta 9 free download. (LTSC and S are not supported)Windows 8.1. Install the update:. Editions Supported: Core, Professional, and EnterpriseWindows 7 SP1. Editions Supported: Home Premium, Professional, Enterprise, UltimateWindows Server 2016.
Editions Supported: Standard & Data CenterWindows Server 2019. Editions Supported: Standard & Data CenterWindows Server 2012 R2. Install the update:. Supported Editions: Essentials, Standard, Datacenter. HardwareThese are the minimum hardware requirements to run Visual Studio 2019.
You need a 1.8 GHz or faster processor. A Quad-core processor or better.
Minimum 2 GB of RAM. But 8 GB of RAM recommended (12.5 if you are running on a Virtual PC). Minimum 800MB of space for basic installation. Complete Installation takes around 210 GB of Hard disk space. For HDD Speed & Performance, Install Visual Studio 2019 & Windows OS on SSD Drive.
The minimum display resolution of 720p (1280 by 720). Display resolution of WXGA (1366 by 768) or higher is recommended.Other Requirements. Dot net Framework 4.5:. Administrator rights are required to install Visual Studio. Internet Explorer 11 or Edge is required for internet-related scenarios.
If you are intended to use please refer to our article onDownload Visual Studio 2019You can download it from. Choose what to installThe Installer will ask for the features you wish to install. The installer will now download each component from the internet and starts the installation. This will take a while depending on your internet speed.Once the installation is complete, you will be presented with the Installation succeeded message along with the option to registerIf you are installing Visual Studio for the first time you will be asked to sign in RegistrationNext, Sign in window appears, you can Sign in or click on Sign up to create a new account.
In case if you wish to continue without Signing in click on “Not now, maybe later” and proceed. You can sign in later from the option Help - Register Product.Note that Community edition will expire after 30 days if you do not register your copy SummaryWe learned how to download & Install Visual Studio 2019. We learned what are the system requirements and the prerequisites required to install the.
April 24th, 2019comes with support for Clang/LLVM out-of-the-box. Visual Studio has had great tooling for MSVC and GCC for quite a while now. The latest preview brings Clang into the fold.Visual Studio 2019 includes out of the box support for editing, building, and debugging CMake projects with Clang/LLVM. If you use MSBuild projects, however, don’t worry.
Support for MSBuild based.vcxproj projects is coming soon as well. If you are not familiar with Visual Studio’s CMake, support.If you are developing on Windows and targeting Clang, we hope to make Visual Studio the best IDE for that job. Please try out the preview and let us know what is working well and what isn’t. Installing Clang/LLVM for use with Visual StudioThe “Desktop development with C” workload with the Visual Studio installer now includes full support for targeting Clang/LLVM based toolsets. You will also need the actual compiler and tools to build your projects. Getting Clang on WindowsOn Windows, it’s easy to install the Clang tools.
Autocad softonic. Create stunning designs and improve collaboration with innovative productivity tools in Autodesk AutoCAD software. Share your work with TrustedDWG™ technology.
Just grab the “Clang compiler for Windows,” an optional component of the “Desktop development with C” workload. This will install everything you need to develop with Clang on Windows.You can also install your own copy of Clang/LLVM or even. If you have already installed Clang/LLVM you don’t need to install the compiler again with the Visual Studio installer. We do recommend that you use the most recent version of Clang to get the best support in the IDE. Older versions may have some limitations. Check out “Using a Custom Version of Clang” below for more information.
Getting Clang on LinuxTo use Clang/LLVM on a remote Linux machine with Visual Studio, just install it with your distribution’s package manager. If ‘which clang’ finds the compiler you are good to go. Getting Started with Clang/LLVM in Visual StudioOnce you have installed Clang, using it with CMake projects is easy. Visual Studio will use the MSVC compiler by default on Windows.
On Linux, it will use the distribution’s default compiler, often GCC. To use Clang instead, add a configuration and select one of the Clang presets.Select “Manage Configurations” from the configuration drop down on the left of the play button. Then click the “Add Configuration” button:Another option is to modify an existing configuration with the CMake Settings editor to use any of the “clang” toolsets with the Toolset dropdown:These toolsets will use Clang in clang-cl mode by default on Windows and link with the Microsoft STL. If you are targeting Linux, they will use Clang in GCC compatibility mode. Toolsets to build both 32 and 64-bit binaries are available on Windows while the Linux toolsets will target the architecture of the remote machine. Most of this behavior can be tweaked by customizing either the CMake command line.

Edit, Build, and DebugOnce you have set up a Clang configuration, build and debug work exactly as you would expect in the IDE. Visual Studio will automatically detect that you are using the Clang compiler and provide applicable IntelliSense, highlighting, navigation, and other editing features. Building projects should just work, provided they are compatible with Clang, with any errors or warnings being directed to the Output Window.Whether you are targeting Windows or Linux, the debugging experience with Clang should be familiar to you. Most of Visual Studio’s debugging features also work with Clang. There are just a few exceptions for compiler dependent features (e.g.
Edit and continue.) Breakpoints, memory and data visualization, and other inner development loop debugging features are available:Using a Custom Installation of ClangVisual Studio will automatically look for Clang in two places:. (Windows) The internally installed copy of Clang/LLVM that comes with the Visual Studio installer. (Windows and Linux) The PATH environment variable.If it doesn’t find Clang in one of those places it will offer to install it on Windows.
On Linux, you will need to install it with the distribution’s package manager. Alternatively, you can tell Visual Studio to use another installation of Clang/LLVM on the machine by setting the “CMAKECCOMPILER” and “CMAKECXXCOMPILER” CMake variables in your CMake Settings:Keep in mind, however, that using old versions of Clang may come with some limitations.
For instance, if you are using the Microsoft STL on Windows, support is only gaurenteed for the most recent version of the compiler. As we release new versions of Visual Studio and the Microsoft STL you may need to upgrade your custom installation.
Using Clang/LLVM with MSBuild ProjectsVisual Studio 2019 version 16.1 ships with out of the box support for Clang/LLVM for CMake projects. Support for MSBuild based C projects is on the roadmap and will be available soon in a future release. To use Clang/LLVM today with MSBuild based C projects there are. Send Us FeedbackPlease try out the and let us know if you have any feedback. It is always appreciated! The best way to get in touch with us about an issue or suggestion is though Developer Community with the “” or “Suggest a Feature” tools. This makes it easy for us to follow up and for you to get the latest updates about our progress.
Feel free to comment here or send an email to with questions as well. This is very exciting for us. In particular I’m looking forward toseeing an official msbuild toolset so we can deprecateAny plans on adding lld support to the toolset and installer?Also was there any reason you didn’t include the more recent 8.0.0release in the installer, or just timing? As release manager I’d bekeen to know if you saw any issues with that release, or if you wantto be involved in the process of future releases.Congratulations on this work, and thanks for a good blog post!(I tried emailing the address in the post, but it bounced.).
Any idea why it is 32bit clang binaries that are shipped with the VS installer? This means I cannot use LTO which is my entire reason for wanting to use clang, if I replace the bin & lib versions from the installer from the LLVM website, which are the 64bit versions it works fine without running out of memory, but this isn’t relaly great for deployment on scale as we have to do some kind of custom setup.Is there plans to ship the 64bit versions by default please, if not I will add a bug / feature request?
- понедельник 30 марта
- 18