Windows Did Not Start Correctly
My windows 7 laptop, dell inspiron N5010 comes up with this when i turn it on!' Windows did not shut down successfully. If this was due to your system not responding, or if the system was shut down to protect data, you might be able to recover by choosing one of the safe mode configurations from the menu below:- Safe mode- Safe mode with Networking- Safe mode with Command prop- Start windows normally'when i click either of these it comes up with different things but nothing is successful. Especially when i click on 'start windows normally' it freezes and the touch pad mouse wont let me click or sign in. It's only a week old.
I got a disc when i received it but i rang up the dell company and they told me to try starting the computer with the disc in and i did but it didn't work. So they said they would send me another disc. I will take it back if the disc they send me doesn't work.and i have no idea why it didn't shut down properly. I didn't do anything with the computer, the next morning i went to turn it on. This came up 'Windows did not shut down successfully.
Method 1: Startup Repair tool Start the system to the installation media for the installed version of Windows. On the Install Windows screen, select Next Repair your computer. On the System Recovery Options screen, select Next Command Prompt. After Startup Repair, select Shutdown, then turn.
If this was due to your system not responding, or if the system was shut down to protect data, you might be able to recover by choosing one of the safe mode configurations from the menu below etc etc etc.' So i'm not to sure why!I don't know what a 'factory restore partition on your system' is but i do have a disc which didn't seem to work!when i let windows take its time out it starts to make grunting noises and freezes and doesn't respond. Your 'Windows did not shut down successfully' could have been a driver that didin't shut down before Windows timed out and shut down. Have you tried a restore point before this happened?
But as suggested above if it's only a week old and you are hearing noises you might want to safe yourself some grief and return it for a replacement. If you want to try and repair yourself then:1) you need to look at that disk again and see if it's a image disk or what is actually on it.2) if it is not an installation disk then wait for the correct disk.3) Call Dell again and ask them if you have a recovery partition ask them how to access it.4) If it continues to make grunting noises I would return it.
Summary
Windows Automatic repair can get stuck in a loop of repairing, then restarting only to go back into the repair, or be stuck in the 'Preparing Automatic Repair' screen. Depending on your specific situations, there are a few corresponding fixes that will help you get out of the problem. If you need to quickly access files from your stuck PC and save them elsewhere, you can apply the data recovery software - EaseUS Data Recovery Wizard.
'My Windows 10 PC has been stuck in a Windows Automatic Repair loop for a couple of days. I didn't do anything different. I just started my laptop, and up came the 'Preparing Automatic Repair' screen. It then rebooted automatically and went right back into Automatic Repair. I figured I should wait it out, but it's been caught in this loop for days now. How can I fix this?'
Issues related to Automatic Repair in Windows could trouble you for hours or days, like the user above. When such problems occur, you will undoubtedly encounter boot failure on your computer, which means all the programs, services, and files on the computer become inaccessible.
It's undoubtedly that you should solve the problem as soon as possible to use the computer for work, study, or recreation as usual. Here I will show you how to bring the computer back to normal by explaining the issue in detail and providing the workable solutions. Read on to get more.
| Workable Solutions | Step-by-step Troubleshooting |
|---|---|
| Case 1. You Got a Black Screen | Method 1. Perform a Hard Reboot..Full steps |
| Case 2. You Got a Blue Screen | Method 1. Restore Windows Registry..Full steps |
About Windows Automatic Repair and Related Issues
Automatic Repair, the same as Startup Repair, is a built-in feature designed to fix boot-related issues for you. It will run automatically when a startup problem arises on a Windows computer. However, it doesn't always work. Many users have been faced with issues related to Automatic Repair, now including you.
What Kind of Situation You Are in
Guild wars 2 grafik mod. When Automatic Repair starts and fails, you will probably find yourself in one of the following situations:
- Windows Automatic Repair gets stuck on a black screen with 'Preparing Automatic Repair' or 'Diagnosing your PC' error message.
- Windows says it is going to preparing Automatic Repair but results in a black screen with nothing on.
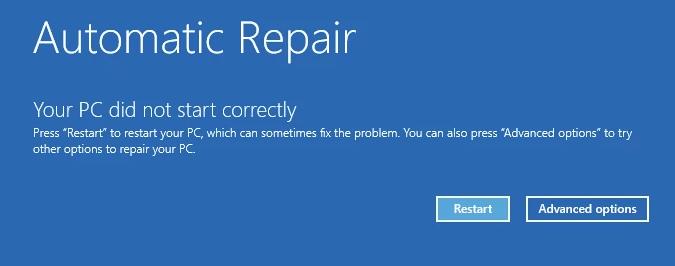
- Windows Automatic Repair results in a blue screen of death, saying 'Your PC did not start correctly' or 'Automatic repair couldn't repair your PC.' If you click 'Restart', you will be stuck in the Automatic Repair loop.
When Will You See 'Preparing Automatic Repair' in Windows
But far too often, Automatic Repair can do more harm than good by getting stuck in a startup repair loop, including the variations. It is a well-documented issue in Windows 10/8.1/8. When will this 'Preparing Automatic Repair' issue appear? Generally, users may come across Automatic Repair loop or related problems after a Windows update or unexpected shutdown of Windows.
Why Is Windows Stuck at 'Preparing Automatic Repair' or the Automatic Repair Loop
Being bothered by the unchanging 'Preparing Automatic Repair' screen or ever-lasting Automatic Repair loop, have you ever wondered about why this issue happens on your computer? There are some common causes:
- Issues with Windows Registry
- BOOTMGR (Windows Boot Manager) file corruption
- Missing or damaged system files
- Issues with the hardware driver (hard drive driver, motherboard driver, graphics driver)
- Other unknown reasons
Fix 'Stuck in Preparing Automatic Repair' and Automatic Repair Loop
Depending on the specific situation you are in, you will have different solutions. The cases listed above can be divided into two categories: black screen or blue screen.
Case 1. You Got a Black Screen
In this case, you are stuck in the 'Preparing Automatic Repair/Diagnosing your PC' screen, or the computer's screen goes black after preparing for an Automatic Repair. The result is you cannot use the built-in repair functions in Windows without the help of Windows Installation Media. Thus, the fixes are:
Method 1. Perform a Hard Reboot
When the computer doesn't respond, perform a hard reboot first. A hard reboot is a way or restarting your computer manually instead of using the operating system controls (soft reboot). The most typical way to perform a hard reboot is to press and hold the power button on the computer until it shuts down. Afterward, start the computer and see whether the issue persists.
Method 2. Refresh or Reset PC
The official Microsoft solution to an endless 'Preparing Automatic Repair' loop is to refresh or reset the PC directly. They state:
'Upon the 'Preparing automatic repair' window, press-and-hold Power button three times to forcefully shut down the machine. The system will enter boot repair page after 2-3 times of reboot, choose Troubleshoot, then go on to Refresh PC or Reset PC.'
If this solution fails to bring you the repair page, continue with the following methods.
Method 3. Boot into Safe Mode
Safe Mode is a diagnostic mode of Windows. It starts your PC with the minimal necessary programs and services. In Safe Mode, you can fix some system-related problems by uninstalling/updating incompatible software/driver, deleting problematic files, removing viruses, and more.
When the computer is stuck at the 'Preparing Automatic Repair/Diagnosing your PC' screen or the computer's screen goes black and stops responding, there will be no choice available on the computer for you to repair the system. Thus, you will need a Windows installation CD/DVD for the following methods. If you do not have the installation disc, follow the guide from Microsoft to create a Windows Installation Media. Then enter Safe Mode:
Step 1. Connect the Windows Installation Media to the computer.
Step 2. Choose to boot from the installation media from the screen.
Step 3. Wait for the files to be loaded.
Step 4. In the Windows Setup window, choose 'Next'.
Step 5. Again, in the Windows Setup window, choose 'Repair your computer' > 'Troubleshoot' > 'Advanced options' > 'Startup Settings'.
Step 6. Choose a Safe Mode option (Safe Mode, Safe Mode with Networking, and Safe Mode with Command Prompt) to enter.
What you can do in Safe Mode:
- Run antivirus software to scan for and remove virus
- Delete problematic files that may result in the 'Preparing Automatic Repair' stuck
- Uninstall suspicious software or drivers
- Update the hardware driver using a CD/DVD/USB that contains the driver
Method 4. Run System File Checker Tool
If the system files on the computer are damaged or missing, that's probably where the issue originates. Fortunately, Windows provides a built-in System File Checker tool, which is a command-line utility for users to check and repair missing or corrupted system files. To use the tool, you need a Windows installation media, as mention above.
Step 1. Connect the Windows Installation Media to the computer.
Step 2. Choose to boot from the installation media from the screen and wait for the installation files to be loaded.
Step 3. In the Windows Setup window, choose 'Next'.
Step 4. Choose 'Repair your computer' > 'Troubleshoot' > 'Advanced options' > 'Command Prompt'.
Step 5. Type sfc /scannow and hit 'Enter'. Afterward, exit Command Prompt and restart the computer.
Method 5. Rebuild BCD
If the Master Boot Record (MBR) and Boot Configuration Data (BCD) are missing, corrupted, or not properly configured, Windows won't be able to start. If this is the case, enter Windows and manually repair the MBR and rebuild the BCD.
Bootrec, also called bootrec.exe utility, is a tool provided by Microsoft in the Windows Recovery Environment. When your computer fails to start, bootrec.exe can be used to fix the Master Boot Record (MBR), Boot Sector, Boot Configuration (BCD), and boot.ini.
Step 1. Insert your Windows installation disc to your computer.
Step 2. Start your computer and boot from your installation DVD.
Step 3. In the Windows Setup window, choose 'Next' > 'Repair your computer'.
Step 4. In the Windows Boot Options menu, choose 'Troubleshoot' > 'Advanced Options' > 'Command Prompt'.
Step 5. When Command Prompt appears, enter the following lines in succession:
Step 6. Restart the computer.
Method 6. Disable Automatic Repair
It's possible that the Automatic Repair itself is the reason why your computer can't boot properly. Thus it's worth trying to disable Automatic Repair in Windows. Wacom tablet software for mac. You need to enter Command Prompt like in method 3 to finish the task.
Step 1. Insert your Windows installation disc to your computer.
Step 2. Start your computer and boot from your installation DVD.
Step 3. In the Windows Setup window, choose 'Next' > 'Repair your computer'.
Step 4. In the Windows Boot Options menu, choose 'Troubleshoot' > 'Advanced Options' > 'Command Prompt'.
Step 5. When Command Prompt appears, enter bcdedit /set {current} recoveryenabled No.
Step 6. Exit Command Prompt and restart the computer.
In Command Prompt, you can also delete problematic files.
Step 1. In the Windows Boot Options menu, choose 'Troubleshoot > Advanced Options > Command Prompt'.
Step 2. In the command line, enter: C: cd WindowsSystem32LogFilesSrt. SrtTrail.txt
If you see something like Critical Boot file c:windowssystem32driversvsock.sys is corrupt, navigate to the specified location using the Command Prompt and enter the del command to delete the problematic file.
Method 7. Extend the System Partition
Windows and some applications require enough space to work correctly. If the system drive on your computer is almost full, you may encounter problems like 'Your PC ran into a problem' or Windows being stuck at 'Preparing Automatic Repair'. To make more free space for the system and applications to operate smoothly, use the partition tool - EaseUS Partition Master to create a portable Windows with the software in and then use the software to extend the system partition on the computer.
Case 2. You Got a Blue Screen
In this case, your PC attempts an Automatic Repair and fails, showing you a blue screen with 'Your PC did not start correctly' or 'Automatic repair couldn't repair your PC.' If you click 'Restart', the computer will go through the same process, resulting in the Automatic Repair loop.
Luckily though, you don't need an installation media like in case 1 since there are advanced options available on the blue screen.
With the advanced options above, you can apply the method 3 - 6 in case 1 to have a try. And there are more solutions for you.
Method 1. Restore Windows Registry
The registry is a database that contains the configuration information of the operating system and most of the applications. That's why registry corruption may lead to serious problems like the Automatic Repair loop. The good news is that the registry makes a back up of configuration data automatically. You can use the backup to restore the Windows registry to a working version.
Step 1. Choose 'Advanced options' in the blue screen and then navigate to 'Troubleshoot' > 'Advanced Options' > 'Command Prompt'.
Step 2. Select the account and enter the password.
Step 3. In Command Prompt, enter the following command in order:
Step 4. Type exit. In the 'Choose an option' screen, choose 'Turn off your PC' and then start your computer.
Method 2. Perform System Restore
If you have created a Windows restore point before the Automatic Repair loop occurs, you can perform a system restore to cope with the issue.
Step 1. Choose 'Advanced options' in the blue screen and then navigate to 'Troubleshoot' > 'Advanced Options' > 'System Restore'.
Step 2. Choose a restore point to restore your computer to the state.
Step 3. Wait until the restore process finishes and then restart your computer.
Method 3. Perform System Image Recovery
Similarly, if you have created a system image on an external storage device before the Automatic Repair loop arises, you can choose to perform a System Image Recovery.
Step 1. Connect the external storage device that contains the system image to the computer.
Step 2. Choose 'Advanced options' in the blue screen and then navigate to 'Troubleshoot' > 'Advanced Options' > 'System Image Recovery'.
Step 3. Choose the system image you want to recover.
Step 4. Follow the 'Re-image your computer wizard' to finish the process.
Step 5. Restart the computer.
Method 4. Disable Early Launch Anti-Malware Protection
Another way to get out of the Windows Automatic Repair loop is to disable early launch anti-malware protection. You can do this from Command Prompt in the Windows Boot Options menu, which will begin to appear after your restart your computer several times.
Step 1. Choose 'Advanced options' in the blue screen and then navigate to 'Troubleshoot' > 'Advanced Options' > 'Startup Settings'. Your computer will restart then present you with a list of options.
Step 2. Choose 'Disable early launch anti-malware protection'.
Step 3. Restart your PC and check if you can boot into Windows.
100% Working Tip: Recover Data from the Computer and Reinstall Windows
No matter what kind of situation you are in, if none of the solutions above works, you can recover data from the computer and then reinstall Windows. To be more specific, you can:
Step 1. Use EaseUS Data Recovery Wizard with bootable media to create a bootable device.
Step 2. Connect the bootable media to the computer and boot Windows from the device.
Step 3. Recover all the files on the disk or partition which you choose to be the system disk/partition. (Don't recover the data to the original disk/partition.)
Step 4. Reinstall Windows.
The Bottom Line
Reinstalling Windows is the last resort since it will erase the files on at least one partition or a whole disk. Luckily, most of the users can fix the 'stuck at Preparing Automatic Repair screen' issue or Automatic Repair loop in Windows 10 or earlier using the given ways. If not, try reinstallation instead. To avoid data loss caused by OS reinstallation, remember to recover your files first before the operations. Hope this guide could help you out of the problem.
- вторник 17 марта
- 84